Wednesday, October 17, 2012

Kitty Tutu

My 2 year old wants to be a cat for Halloween. My 7 year old is going to be a bride. And I KNOW that as soon as my 2 year old sees the big puffy dress the 7 year old gets to wear she is going to want a "Pwincess" dress to. So to avoid a tantrum I decided to make her a kitty tutu. This would be my first attempt at a tutu and off to Joann's we went. 

Here is what I bought...

  • elastic band
  • glitter tulle  1/2 a yard in black, 1/2 a yard in grey and 1/2 a yard in white (The plain tulle is much cheaper I later learned) 
  • ribbon (optional)


1. Measure the elastic band around your kids waist. I gave myself about an inch extra for sewing.
2. Sew the band together. (I have even seen people just tie it together)


3. Cute the tulle in strips. My kid is pretty small and I wanted a puffy skirt so I cut 17 inch strips about 1.5 inches wide.

4. Then take your strips and attach them to the elastic band using the Lark's head knot. If you are not a girl scout here is how to make the knot. Oh and I found it easier to put the band around my knees to keep it tight and easy to tie tulle to.


5. Go all the way around. I alternated the colors.
7. If you want tie a bow to the front or side.


I already tried in on my 2 year old. She loved it and then threw a fit when it was time to take it off. So much for avoiding a tantrum.

Wednesday, October 3, 2012

Dinner for 2!

Here at home its just the two of us (plus our two dog children, but they eat dog food only) so I am constantly looking for recipes for two. I recently found this awesome website and she had recipes for dinners for two for a whole week! Bonus: $40 was the grocery cost!! Look for the link at the end of this post. So I went for it. It turned out AMAZING! You need to know that before I started this, my boyfriend was the one who made dinner, so I had basically no cooking experience. Here are pictures of all the meals...

Roasted Chicken with Baked Potatoes and Green Beans


Chicken Quesadillas

Pork Stir-Fry


Flat-bread Pizzas


BBQ Pork Sandwiches and Pasta Salad


Jambalaya


 Spaghetti (I forgot to take a picture before we ate it)

I LOVED THIS MENU PLAN! It gave me some cooking skills and it has saved us some $$! I was able to do all my shopping for $38.49! Definitely brought my grocery bill down.

So for my boyfriend, his favorite was the chicken quesadillas. They were so stuffed and filling!! My favorite was the Jambalaya. I have learned that cooking with chorizo for something other than breakfast is an amazing idea! Here is the link! Dinner for two for $40. On a side note, I did some research and there is a 2nd edition of this fabulous menu plan. Here is the link for that. Dinner for two Part Two

Sunday, September 16, 2012

DIY Wreath

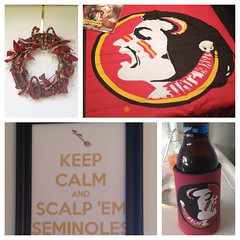
My boyfriend is a big Florida State University fan, so when the season started, I wanted to bring a little garnet and gold into our house. I've seen all these wonderful DIY wreaths on Pinterest, so I thought I'd take a shot at one. So I headed to Michaels...

Things I purchased...
Wreath made out of sticks/twigs
Wooden Letters
Paint, one gold and one garnet
2 spools of ribbons, one gold and one garnet
Refills for my mini hot glue gun.
Over-the-door wreath hanger

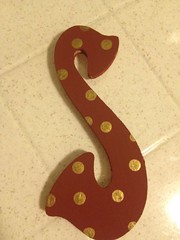
So the first thing I did was paint all my letters garnet. I gave them two coats. After they dried I used the eraser from my pencil and painted gold polk-a-dots all over them. They came out too cute!


Untitled

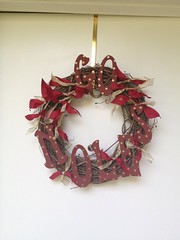
Then I cut my ribbon. I'm not great at making bows so I just cut them into same-sized pieces and then tied them in a knot. I did a piece of gold and garnet together. Then it was time to assemble everything. I wasn't sure I was going to have enough ribbon to really cover my wreath so I glued my letters first. Use a lot of hot glue! Then I glued my knots. 


Untitled

So there it is. Pretty cute! My boyfriend was really surprised to come home to it.

Go Noles!
Untitled

Saturday, September 1, 2012

Quick Personalized Gift Bag

I always only have Christmas wrapping paper. Never wedding, or birthday. The only time I buy wrapping paper is at Christmas time. So when it comes to birthday gifts I usually have to think outside the box. This morning I had a gift for my Mom that needed to be "wrapped". So here is what we did.


I took a typical canvas shopping bag. Now I could not very well just hand her the bag like this.


So I gave the girls a piece of paper and crayons and let them draw something for Nana.


After they were done I stapled the pictures to the bag. The only issue I can across was stapling the bottom of the pictures. I stapled through the bottom of the bag which didn't let the bag open properly. All I did was gently remove the staple from the bottom of the bag while keeping it intact to the front of the bag.


Not gorgeous but much more festive!


And what Grandma wouldn't want pictures drawn by her Grandbabies!


Tuesday, August 28, 2012

Charlotte's Ombre Pink Baby Blanket

It has been a long time since I have made anything. But when my friend Crystal announced that she was having a baby girl, I had to go straight to a craft store and buy some pink yarn. With this "ombre" stuff being all the rage these days, I really wanted to make a pink ombre blanket for Baby Charlotte. I wanted a chevron pattern, but thought it was too "sharp", so when I found this ripple pattern I knew it would be perfect! 


Hope you like your blanket Charlie! We can't wait to meet you!

Monday, August 27, 2012

Crepe Paper Flower Mirror

Elissa here! I would like to introduce my youngest sister Mercy Elaine! She has been doing some really cool crafty things and is now going to be posting here at Knitter Please! Take it away Mercy Elaine!
____________________________________________________________________________

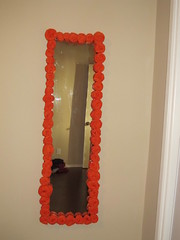
I bought this $10 over-the-door mirror from Walmart with the idea of upgrading it somehow. I finally did it. 

All you need is: 
1. cheap mirror 
2. crepe paper/streamers. I used about 3 rolls of orange streamers. 
3. hot glue gun 

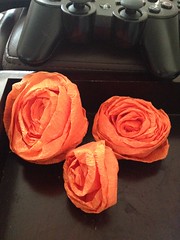
They came 2 rolls for $1 at the 99 cents only store. (love that place) I sat down and made a bunch of these crepe paper flowers.


Basically I just wrap the paper around the pointer and middle finger while also twisting. Then when you get it to the size you like, just tear, glue, and slip off your finger. You can then play with it to get it just right. Smash is down a little, fold the "petals" down to open up the flower. Once you do a couple it will become really easy. You don't have to use a hot glue gun to finish the flower, you can use elmer's glue or glue dots.

photo
 

I do recommend using a hot glue gun for sticking the flowers to the mirror. My mirror's frame was a plastic-type material, so that's what worked best. I also sprayed the flowers with hairspray (thanks Joey!) just to help them hold their shape. As long as these don't get wet, they last.

IMG_1842
 

And that's it! 
**I used Command Strips to hang my mirror.**

Friday, August 24, 2012

Place-mats

Recently we moved Louie out of her high chair and into a regular chair with a booster seat. And just like her sister, Louie is a messy eater. So plastic place mats are a must. We use to get The Phi a new one every season. Target use to be really great about selling cute ones for cheap. The last few seasons I have not seen them, so The Phi's mat is pretty torn up and now that Louie is at the table she needs one too. Since trusty Target has failed me I decided to make my own place mats for the girls. I also decided to make one for my niece and one for my nephew.

Materials:
  • 11x17 gloss paper
  • 12x18 laminating pouch
  • laminating machine
  • printer
  • Word program
Instructions:
  • Open a blank document in Word. Change paper size to 11x17. Change orientation to landscape. Change margins to Narrow. 
  • Head over to your favorite search engine and do an image search. I found that by searching for desktop wallpapers and the large size, gave me a great image to work with. 
  • Copy and paste your picture. Center it and spread it across the whole page. 
  • Next add a text box to add the name.
  • Print and laminate!


Since they are laminated you can wipe them clean. These are so easy to make you can change them out as often as you like!