Friday, March 20, 2015

Purple Rain Granny Square Blanket

After posting about Phi's rainbow granny square blanket a friend in Illinois asked if I could make her one but in purples. I was happy to do it. 

This time I used thick more wool yarn and a more holey square pattern. I used 3 different colors, 2 skeins. I used purple, dusty purple and eggplant. I was able to make 36 squares in all with 3 made up of all 3 colors combined. 

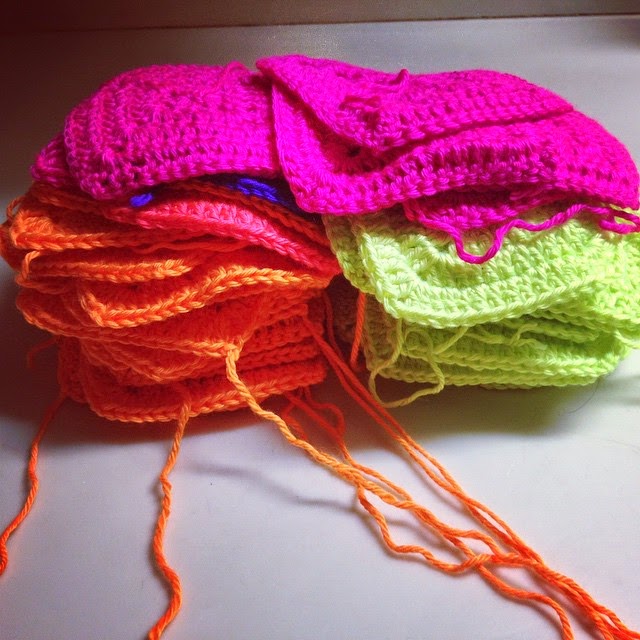
Here are the squares begging to be joined. 


I went with a 6 x 6 and random pattern. The only hard part is making sure the same colors are not touching each other. I used a dark charcoal and a single crochet join. I like the raised line it makes.


I needed to bulk up the size of the blanket to make it big enough for an adult lap blanket so I added a thick strips in between each row of squares.

After joining with thick strips and adding a border. After a gentle wash and a overnight of blocking it was ready to pack up and send off to its new home in Illinois.


I am still loving these granny squares!


Tuesday, February 3, 2015

Phi's Neon Cube Blanket

This blanket was a real labor of love and took 2 years to get done. A few years ago when I was buying yarn for a baby blanket Phi showed me these new neon colors and loved them. She asked me to make her a cool blanket with it. 2 years later I pulled out the yarn again. I have been wanting to work on a bigger granny square blanket. I love how productive you feel when making granny squares. I started in December. I used 5 skeins to make a total of 90 squares. 


After the squares were all done it was time to put them together. I wanted a black border around each square so I went with a crochet stitch to connect them together. Each row is 9 squares.This process took me awhile. I could do about 2 rows a night. Then it took another night to sew in and trim all the edges.


I made 10 rows of 9 to give the blanket more length than width. After all 90 squares were done it was border time. I went with a single stitch black border with a few rows of a mixed neon yarn to give it more color.


A wash and a block overnight and the blanket was ready for its new owner.


This is the most difficult blanket I have done and is now one of my favorites. 

Tuesday, June 17, 2014

Granny Square Blanket


I have always wants to do granny squares. Early in my crocheting career (haha) I attempted one and I think I was a bit overconfident. I started with a square that was way too complicated for me. My buddy Crystal is having a baby boy in a few months. I have a big bag of this gorgeous brown and cream colored yarn that I wanted to use but I wanted something a little different. I have been doing a lot of chevron type blankets. I needed a change and I wanted a challenge.

I searched my usual places (Ravelry and Pinterest) and found a super basic granny square pattern. It took me about 4 attempts to get the pattern down. Once I mastered the joining into a circle it is all double crochets and chains.

What I loved about this was that, even though it took me a month or so to make all the squares, I felt productive. Each square took about 5 minutes to make so it felt like I was finishing something. I made the blanket 5 squares by 6 squares so I made 30 in all. 15 brown and 15 cream. It was very satisfying to see the piles of squares grow.

The squares may be easy, but this pattern gets back at you with all the sewing in ends and sewing the squares together. Each square had 2 tails that had to be sewn in. This is tedious work, but I kind of love it. I just fired up my tablet with an episode of "Hart of Dixie" (my new favorite show) and got to work. Once the ends were taken care of I was left with nice and neat squares.

Now it was time to sew them together. I used my big crochet sewing needle and the cream colored yarn


First I sewed each row. Place the squares back to back and all the stitches should line up. I did a simple mattress stitch across the entire edge. There a a few different ways to join squares together. I alternated colors and sewed together 5 for each row. Then I did the same thing when I sewed each row together. I was worried that it would not lay flat but it totally did!


I am super happy with how it came out. It is a great size for a brand new baby!
 I can't wait to give it to Baby Jameson! (coolest name ever!)

Sunday, February 24, 2013

Broom Lace Stitch Scarf


My daughters teacher recently let me borrow Downton Abbey Sesaon 3 on DVD. Don't get me started on the ending. I decided to  make her a scarf as a thank you. I wanted something quick but different. I have been working on chevron blankets forever and wanted something a little more challenging. After a quick search online I found the Broom Lace Stitch. 


2 skeins of yarn a crochet hook and the biggest knitting needle I have, a week or so and it was done. This stitch is so fun and looks really cool.

This would make a really cute blanket but I would need a really long knitting needle! I hope the teacher likes it!

Tuesday, February 12, 2013

Coral and Turquoise Chevron Blanket

At Baby Matthew's baby shower I gave him a grey and black chevron blanket that I had made. When my cousin opened it my Tia Grace grabbed it, and said how much she liked and and that she wanted one. So a few days later, while at Michael s Craft Store I called up my Tia Grace's kids and asked them what colors she liked. Her son said blue and her daughter said coral. I found some amazing coral, turquoise and tan color soft Impeccable yarn on sale and grabbed what I needed.


I took about 2 months and I used the basic chevron crochet stitch.


I love the colors and pattern of this blanket! The dimensions ended up being about 4 feet by 2.5 feet. If I could do it all over again I would make it wider. After the body was done I added side borders to give it a little more width.


It will make a nice lap blanket.


When my Tia said she wanted a blanket I saw it as an opportunity for me to say thank you to her and to tell her how much I love and appreciate her. Almost a year ago my Grandparents moved out of their home because it was time for them to move in with someone so that they could be taken care of. Between medications and dialysis appointments things were getting hard for them. So my Tia Grace opened her home to them. My Nana and Tata moved only down the street from their old house and into my Tia's house. I know what a big deal this is and I am so thankful that my Nana and Tata have a wonderful place to stay.

So this blanket is just my way of thanking my Tia and telling her how much I love her and her big heart!


Wednesday, December 19, 2012

Ombre for Pearmama


After I made a pink ombre blanket for baby Charlotte my friend Pearmama mentioned she would like one in turquoise. I was more than happy to oblige. It took me a long long time. I went with the generic chevron double stitch. I loved the colors. This blanket was big. Like twin comforter size. But I knew that Denise, a true artist, would appreciate the love and time I put into the blanket.

Wednesday, November 21, 2012

Office Supply Angel Ornaments

This year I was invited to participate in an ornament exchange. After combing Pinterest I found a really easy and cute ornament. AND it involved office supplies. I LOVE office supplies. So here is what I used:


  • Large Butterfly clips (also called idea clamps)
  • 1/8 inch ribbon
  • 15mm bells or beads


Assembling these are super easy. Cut 12 inch pieces of ribbon. Cut the ends at a angle!
The hardest step is getting the ribbon through the bell! Loop at the bottom.

Then pull the loop through the back middle of the clamp.


Use a lark heads knot to secure.


Next time a knot at the top of the bell or bead. 


Then knot the top!

These are really easy and cute. I think they would be easy to embellish too. Adding a halo or flowers in her hands, lace to the wings. The possibilities are endless!

Wednesday, October 17, 2012

Kitty Tutu

My 2 year old wants to be a cat for Halloween. My 7 year old is going to be a bride. And I KNOW that as soon as my 2 year old sees the big puffy dress the 7 year old gets to wear she is going to want a "Pwincess" dress to. So to avoid a tantrum I decided to make her a kitty tutu. This would be my first attempt at a tutu and off to Joann's we went. 

Here is what I bought...

  • elastic band
  • glitter tulle  1/2 a yard in black, 1/2 a yard in grey and 1/2 a yard in white (The plain tulle is much cheaper I later learned) 
  • ribbon (optional)


1. Measure the elastic band around your kids waist. I gave myself about an inch extra for sewing.
2. Sew the band together. (I have even seen people just tie it together)


3. Cute the tulle in strips. My kid is pretty small and I wanted a puffy skirt so I cut 17 inch strips about 1.5 inches wide.

4. Then take your strips and attach them to the elastic band using the Lark's head knot. If you are not a girl scout here is how to make the knot. Oh and I found it easier to put the band around my knees to keep it tight and easy to tie tulle to.


5. Go all the way around. I alternated the colors.
7. If you want tie a bow to the front or side.


I already tried in on my 2 year old. She loved it and then threw a fit when it was time to take it off. So much for avoiding a tantrum.

Wednesday, October 3, 2012

Dinner for 2!

Here at home its just the two of us (plus our two dog children, but they eat dog food only) so I am constantly looking for recipes for two. I recently found this awesome website and she had recipes for dinners for two for a whole week! Bonus: $40 was the grocery cost!! Look for the link at the end of this post. So I went for it. It turned out AMAZING! You need to know that before I started this, my boyfriend was the one who made dinner, so I had basically no cooking experience. Here are pictures of all the meals...

Roasted Chicken with Baked Potatoes and Green Beans


Chicken Quesadillas

Pork Stir-Fry


Flat-bread Pizzas


BBQ Pork Sandwiches and Pasta Salad


Jambalaya


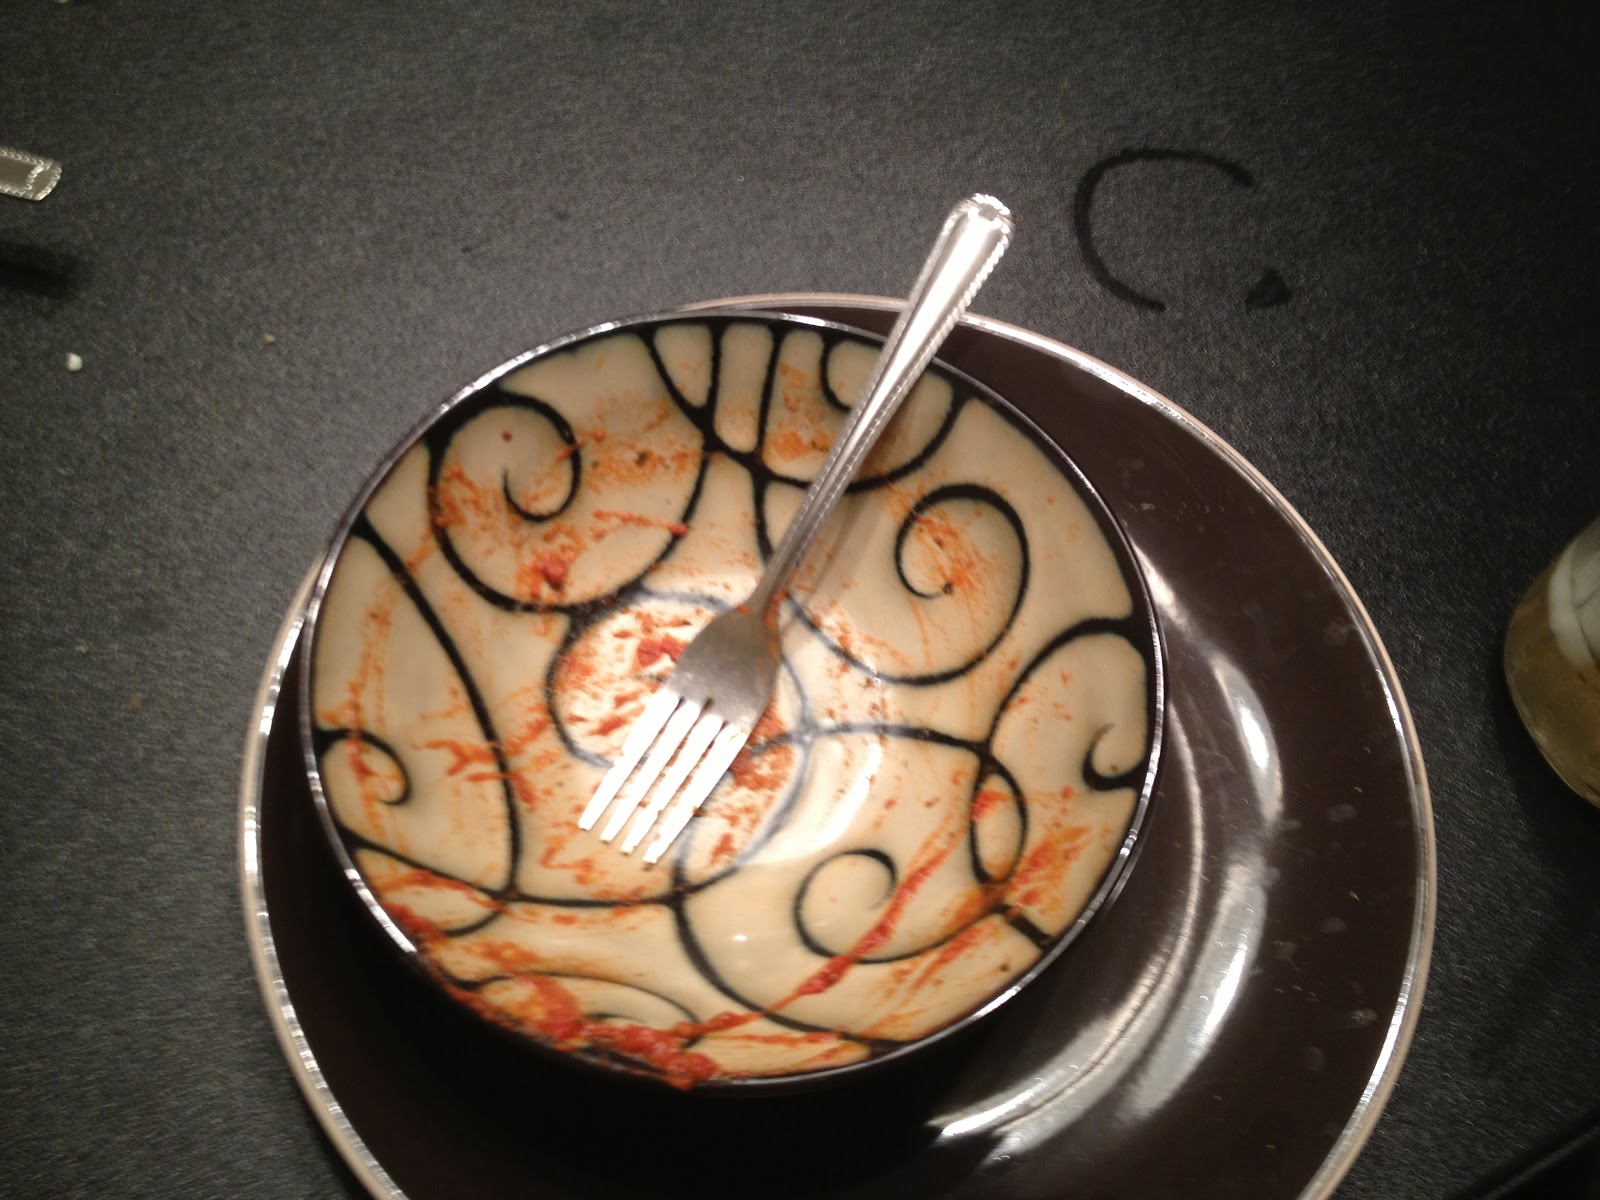
 Spaghetti (I forgot to take a picture before we ate it)

I LOVED THIS MENU PLAN! It gave me some cooking skills and it has saved us some $$! I was able to do all my shopping for $38.49! Definitely brought my grocery bill down.

So for my boyfriend, his favorite was the chicken quesadillas. They were so stuffed and filling!! My favorite was the Jambalaya. I have learned that cooking with chorizo for something other than breakfast is an amazing idea! Here is the link! Dinner for two for $40. On a side note, I did some research and there is a 2nd edition of this fabulous menu plan. Here is the link for that. Dinner for two Part Two

Sunday, September 16, 2012

DIY Wreath

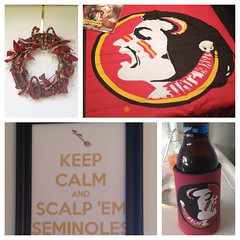
My boyfriend is a big Florida State University fan, so when the season started, I wanted to bring a little garnet and gold into our house. I've seen all these wonderful DIY wreaths on Pinterest, so I thought I'd take a shot at one. So I headed to Michaels...

Things I purchased...
Wreath made out of sticks/twigs
Wooden Letters
Paint, one gold and one garnet
2 spools of ribbons, one gold and one garnet
Refills for my mini hot glue gun.
Over-the-door wreath hanger

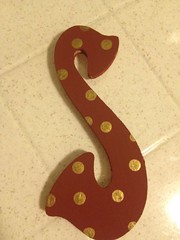
So the first thing I did was paint all my letters garnet. I gave them two coats. After they dried I used the eraser from my pencil and painted gold polk-a-dots all over them. They came out too cute!


Untitled

Then I cut my ribbon. I'm not great at making bows so I just cut them into same-sized pieces and then tied them in a knot. I did a piece of gold and garnet together. Then it was time to assemble everything. I wasn't sure I was going to have enough ribbon to really cover my wreath so I glued my letters first. Use a lot of hot glue! Then I glued my knots. 


Untitled

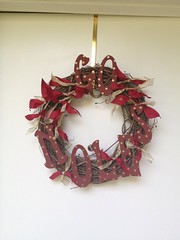
So there it is. Pretty cute! My boyfriend was really surprised to come home to it.

Go Noles!
Untitled

Saturday, September 1, 2012

Quick Personalized Gift Bag

I always only have Christmas wrapping paper. Never wedding, or birthday. The only time I buy wrapping paper is at Christmas time. So when it comes to birthday gifts I usually have to think outside the box. This morning I had a gift for my Mom that needed to be "wrapped". So here is what we did.


I took a typical canvas shopping bag. Now I could not very well just hand her the bag like this.


So I gave the girls a piece of paper and crayons and let them draw something for Nana.


After they were done I stapled the pictures to the bag. The only issue I can across was stapling the bottom of the pictures. I stapled through the bottom of the bag which didn't let the bag open properly. All I did was gently remove the staple from the bottom of the bag while keeping it intact to the front of the bag.


Not gorgeous but much more festive!


And what Grandma wouldn't want pictures drawn by her Grandbabies!


Tuesday, August 28, 2012

Charlotte's Ombre Pink Baby Blanket

It has been a long time since I have made anything. But when my friend Crystal announced that she was having a baby girl, I had to go straight to a craft store and buy some pink yarn. With this "ombre" stuff being all the rage these days, I really wanted to make a pink ombre blanket for Baby Charlotte. I wanted a chevron pattern, but thought it was too "sharp", so when I found this ripple pattern I knew it would be perfect! 


Hope you like your blanket Charlie! We can't wait to meet you!

Monday, August 27, 2012

Crepe Paper Flower Mirror

Elissa here! I would like to introduce my youngest sister Mercy Elaine! She has been doing some really cool crafty things and is now going to be posting here at Knitter Please! Take it away Mercy Elaine!
____________________________________________________________________________

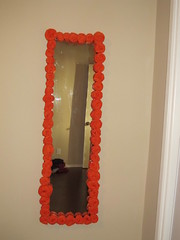
I bought this $10 over-the-door mirror from Walmart with the idea of upgrading it somehow. I finally did it. 

All you need is: 
1. cheap mirror 
2. crepe paper/streamers. I used about 3 rolls of orange streamers. 
3. hot glue gun 

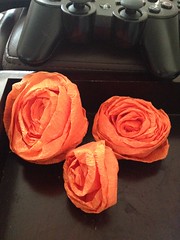
They came 2 rolls for $1 at the 99 cents only store. (love that place) I sat down and made a bunch of these crepe paper flowers.


Basically I just wrap the paper around the pointer and middle finger while also twisting. Then when you get it to the size you like, just tear, glue, and slip off your finger. You can then play with it to get it just right. Smash is down a little, fold the "petals" down to open up the flower. Once you do a couple it will become really easy. You don't have to use a hot glue gun to finish the flower, you can use elmer's glue or glue dots.

photo
 

I do recommend using a hot glue gun for sticking the flowers to the mirror. My mirror's frame was a plastic-type material, so that's what worked best. I also sprayed the flowers with hairspray (thanks Joey!) just to help them hold their shape. As long as these don't get wet, they last.

IMG_1842
 

And that's it! 
**I used Command Strips to hang my mirror.**